Using CouchDB
This tutorial will describe the steps required to use the CouchDB as the state database with Hyperledger Fabric. By now, you should be familiar with Fabric concepts and have explored some of the samples and tutorials.
Nota
These instructions use the new Fabric chaincode lifecycle introduced in the Fabric v2.0 release. If you would like to use the previous lifecycle model to use indexes with chaincode, visit the v1.4 version of the Using CouchDB.
The tutorial will take you through the following steps:
- Enable CouchDB in Hyperledger Fabric
- Create an index
- Add the index to your chaincode folder
- Install and define the Chaincode
- Query the CouchDB State Database
- Use best practices for queries and indexes
- Query the CouchDB State Database With Pagination
- Update an Index
- Delete an Index
For a deeper dive into CouchDB refer to CouchDB as the State Database and for more information on the Fabric ledger refer to the Ledger topic. Follow the tutorial below for details on how to leverage CouchDB in your blockchain network.
Throughout this tutorial, we will use the Marbles sample as our use case to demonstrate how to use CouchDB with Fabric and will deploy Marbles to the Fabric test network. You should have completed the task Instale exemplos, executáveis e imagens Docker.
Why CouchDB?
Fabric supports two types of peer databases. LevelDB is the default state database embedded in the peer node. LevelDB stores chaincode data as simple key-value pairs and only supports key, key range, and composite key queries. CouchDB is an optional, alternate state database that allows you to model data on the ledger as JSON and issue rich queries against data values rather than the keys. CouchDB also allows you to deploy indexes with your chaincode to make queries more efficient and enable you to query large datasets.
In order to leverage the benefits of CouchDB, namely content-based JSON queries, your data must be modeled in JSON format. You must decide whether to use LevelDB or CouchDB before setting up your network. Switching a peer from using LevelDB to CouchDB is not supported due to data compatibility issues. All peers on the network must use the same database type. If you have a mix of JSON and binary data values, you can still use CouchDB, however the binary values can only be queried based on key, key range, and composite key queries.
Enable CouchDB in Hyperledger Fabric
CouchDB runs as a separate database process alongside the peer. There
are additional considerations in terms of setup, management, and operations.
A Docker image of CouchDB
is available and we recommend that it be run on the same server as the
peer. You will need to setup one CouchDB container per peer
and update each peer container by changing the configuration found in
core.yaml to point to the CouchDB container. The core.yaml
file must be located in the directory specified by the environment variable
FABRIC_CFG_PATH:
- For Docker deployments,
core.yamlis pre-configured and located in the peer containerFABRIC_CFG_PATHfolder. However, when using Docker environments, you typically pass environment variables by editing thedocker-compose-couch.yamlto override the core.yaml - For native binary deployments,
core.yamlis included with the release artifact distribution.
Edit the stateDatabase section of core.yaml. Specify CouchDB as the
stateDatabase and fill in the associated couchDBConfig properties. For
more information, see CouchDB configuration.
Create an index
Why are indexes important?
Indexes allow a database to be queried without having to examine every row with every query, making them run faster and more efficiently. Normally, indexes are built for frequently occurring query criteria allowing the data to be queried more efficiently. To leverage the major benefit of CouchDB – the ability to perform rich queries against JSON data – indexes are not required, but they are strongly recommended for performance. Also, if sorting is required in a query, CouchDB requires an index of the sorted fields.
Nota
Rich queries that do not have an index will work but may throw a warning in the CouchDB log that the index was not found. However, if a rich query includes a sort specification, then an index on that field is required; otherwise, the query will fail and an error will be thrown.
To demonstrate building an index, we will use the data from the Marbles sample. In this example, the Marbles data structure is defined as:
type marble struct {
         ObjectType string `json:"docType"` //docType is used to distinguish the various types of objects in state database
         Name       string `json:"name"`    //the field tags are needed to keep case from bouncing around
         Color      string `json:"color"`
         Size       int    `json:"size"`
         Owner      string `json:"owner"`
}
In this structure, the attributes (docType, name, color, size,
owner) define the ledger data associated with the asset. The attribute
docType is a pattern used in the chaincode to differentiate different data
types that may need to be queried separately. When using CouchDB, it
recommended to include this docType attribute to distinguish each type of
document in the chaincode namespace. (Each chaincode is represented as its own
CouchDB database, that is, each chaincode has its own namespace for keys.)
With respect to the Marbles data structure, docType is used to identify
that this document/asset is a marble asset. Potentially there could be other
documents/assets in the chaincode database. The documents in the database are
searchable against all of these attribute values.
When defining an index for use in chaincode queries, each one must be defined in its own text file with the extension *.json and the index definition must be formatted in the CouchDB index JSON format.
To define an index, three pieces of information are required:
- fields: these are the frequently queried fields
- name: name of the index
- type: always json in this context
For example, a simple index named foo-index for a field named foo.
{
    "index": {
        "fields": ["foo"]
    },
    "name" : "foo-index",
    "type" : "json"
}
Optionally the design document attribute ddoc can be specified on the index
definition. A design document is
CouchDB construct designed to contain indexes. Indexes can be grouped into
design documents for efficiency but CouchDB recommends one index per design
document.
Dica
When defining an index it is a good practice to include the ddoc
attribute and value along with the index name. It is important to
include this attribute to ensure that you can update the index later
if needed. Also it gives you the ability to explicitly specify which
index to use on a query.
Here is another example of an index definition from the Marbles sample with
the index name indexOwner using multiple fields docType and owner
and includes the ddoc attribute:
{
  "index":{
      "fields":["docType","owner"] // Names of the fields to be queried
  },
  "ddoc":"indexOwnerDoc", // (optional) Name of the design document in which the index will be created.
  "name":"indexOwner",
  "type":"json"
}
In the example above, if the design document indexOwnerDoc does not already
exist, it is automatically created when the index is deployed. An index can be
constructed with one or more attributes specified in the list of fields and
any combination of attributes can be specified. An attribute can exist in
multiple indexes for the same docType. In the following example, index1
only includes the attribute owner, index2 includes the attributes
owner and color and index3 includes the attributes owner, color and
size. Also, notice each index definition has its own ddoc value, following
the CouchDB recommended practice.
{
  "index":{
      "fields":["owner"] // Names of the fields to be queried
  },
  "ddoc":"index1Doc", // (optional) Name of the design document in which the index will be created.
  "name":"index1",
  "type":"json"
}

{
  "index":{
      "fields":["owner", "color"] // Names of the fields to be queried
  },
  "ddoc":"index2Doc", // (optional) Name of the design document in which the index will be created.
  "name":"index2",
  "type":"json"
}

{
  "index":{
      "fields":["owner", "color", "size"] // Names of the fields to be queried
  },
  "ddoc":"index3Doc", // (optional) Name of the design document in which the index will be created.
  "name":"index3",
  "type":"json"
}
In general, you should model index fields to match the fields that will be used in query filters and sorts. For more details on building an index in JSON format refer to the CouchDB documentation.
A final word on indexing, Fabric takes care of indexing the documents in the
database using a pattern called index warming. CouchDB does not typically
index new or updated documents until the next query. Fabric ensures that
indexes stay “warm” by requesting an index update after every block of data is
committed. This ensures queries are fast because they do not have to index
documents before running the query. This process keeps the index current
and refreshed every time new records are added to the state database.
Add the index to your chaincode folder
Once you finalize an index, you need to package it with your chaincode for
deployment by placing it in the appropriate metadata folder. You can install the
chaincode using the peer lifecycle chaincode command. The JSON index files
must be located under the path META-INF/statedb/couchdb/indexes which is
located inside the directory where the chaincode resides.
The Marbles sample below illustrates how the index is packaged with the chaincode.
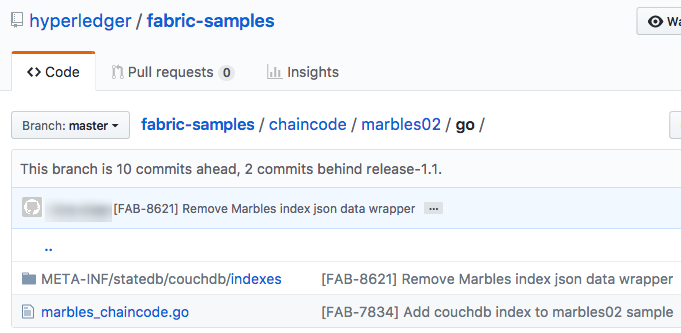
This sample includes one index named indexOwnerDoc:
{"index":{"fields":["docType","owner"]},"ddoc":"indexOwnerDoc", "name":"indexOwner","type":"json"}
Start the network
Try it yourself
We will bring up the Fabric test network and use it to deploy the marbles chainocde. Use the following command to navigate to the test-network directory in the Fabric samples:
cd fabric-samples/test-network
For this tutorial, we want to operate from a known initial state. The following command will kill any active or stale Docker containers and remove previously generated artifacts:
./network.sh down
If you have not run through the tutorial before, you will need to vendor the chaincode dependencies before we can deploy it to the network. Run the following commands:
cd ../chaincode/marbles02/go
GO111MODULE=on go mod vendor
cd ../../../test-network
From the test-network directory, deploy the test network with CouchDB with the following command:
./network.sh up createChannel -s couchdb
This will create two fabric peer nodes that use CouchDB as the state database.
It will also create one ordering node and a single channel named
mychannel.
Install and define the Chaincode
Client applications interact with the blockchain ledger through chaincode. Therefore we need to install a chaincode on every peer that will execute and endorse our transactions. However, before we can interact with our chaincode, the members of the channel need to agree on a chaincode definition that establishes chaincode governance. In the previous section, we demonstrated how to add the index to the chaincode folder so that the index is deployed with the chaincode.
The chaincode needs to be packaged before it can be installed on our peers. We can use the peer lifecycle chaincode package command to package the marbles chaincode.
Try it yourself
1. After you start the test network, copy and paste the following environment variables in your CLI to interact with the network as the Org1 admin. Make sure that you are in the test-network directory.
export PATH=${PWD}/../bin:${PWD}:$PATH
export FABRIC_CFG_PATH=${PWD}/../config/
export CORE_PEER_TLS_ENABLED=true
export CORE_PEER_LOCALMSPID="Org1MSP"
export CORE_PEER_TLS_ROOTCERT_FILE=${PWD}/organizations/peerOrganizations/org1.example.com/peers/peer0.org1.example.com/tls/ca.crt
export CORE_PEER_MSPCONFIGPATH=${PWD}/organizations/peerOrganizations/org1.example.com/users/Admin@org1.example.com/msp
export CORE_PEER_ADDRESS=localhost:7051
- Use the following command to package the marbles chaincode:
peer lifecycle chaincode package marbles.tar.gz --path ../chaincode/marbles02/go --lang golang --label marbles_1
This command will create a chaincode package named marbles.tar.gz.
3. Use the following command to install the chaincode package onto the peer
peer0.org1.example.com:
peer lifecycle chaincode install marbles.tar.gz
A successful install command will return the chaincode identifier, similar to the response below:
2019-04-22 18:47:38.312 UTC [cli.lifecycle.chaincode] submitInstallProposal -> INFO 001 Installed remotely: response:<status:200 payload:"\nJmarbles_1:0907c1f3d3574afca69946e1b6132691d58c2f5c5703df7fc3b692861e92ecd3\022\tmarbles_1" >
2019-04-22 18:47:38.312 UTC [cli.lifecycle.chaincode] submitInstallProposal -> INFO 002 Chaincode code package identifier: marbles_1:0907c1f3d3574afca69946e1b6132691d58c2f5c5703df7fc3b692861e92ecd3
After installing the chaincode on peer0.org1.example.com, we need to approve
a chaincode definition for Org1.
4. Use the following command to query your peer for the package ID of the installed chaincode.
peer lifecycle chaincode queryinstalled
The command will return the same package identifier as the install command. You should see output similar to the following:
Installed chaincodes on peer:
Package ID: marbles_1:60ec9430b221140a45b96b4927d1c3af736c1451f8d432e2a869bdbf417f9787, Label: marbles_1
5. Declare the package ID as an environment variable. Paste the package ID of
marbles_1 returned by the peer lifecycle chaincode queryinstalled command
into the command below. The package ID may not be the same for all users, so
you need to complete this step using the package ID returned from your console.
export CC_PACKAGE_ID=marbles_1:60ec9430b221140a45b96b4927d1c3af736c1451f8d432e2a869bdbf417f9787
6. Use the following command to approve a definition of the marbles chaincode for Org1.
export ORDERER_CA=${PWD}/organizations/ordererOrganizations/example.com/orderers/orderer.example.com/msp/tlscacerts/tlsca.example.com-cert.pem
peer lifecycle chaincode approveformyorg -o localhost:7050 --ordererTLSHostnameOverride orderer.example.com --channelID mychannel --name marbles --version 1.0 --signature-policy "OR('Org1MSP.member','Org2MSP.member')" --init-required --package-id $CC_PACKAGE_ID --sequence 1 --tls true --cafile $ORDERER_CA
When the command completes successfully you should see something similar to :
2020-01-07 16:24:20.886 EST [chaincodeCmd] ClientWait -> INFO 001 txid [560cb830efa1272c85d2f41a473483a25f3b12715d55e22a69d55abc46581415] committed with status (VALID) at
We need a majority of organizations to approve a chaincode definition before it can be committed to the channel. This implies that we need Org2 to approve the chaincode definition as well. Because we do not need Org2 to endorse the chaincode and did not install the package on any Org2 peers, we do not need to provide a packageID as part of the chaincode definition.
7. Use the CLI to operate as the Org2 admin. Copy and paste the following block of commands as a group into the peer container and run them all at once.
export CORE_PEER_LOCALMSPID="Org2MSP"
export CORE_PEER_TLS_ROOTCERT_FILE=${PWD}/organizations/peerOrganizations/org2.example.com/peers/peer0.org2.example.com/tls/ca.crt
export CORE_PEER_MSPCONFIGPATH=${PWD}/organizations/peerOrganizations/org2.example.com/users/Admin@org2.example.com/msp
export CORE_PEER_ADDRESS=localhost:9051
- Use the following command to approve the chaincode definition for Org2:
peer lifecycle chaincode approveformyorg -o localhost:7050 --ordererTLSHostnameOverride orderer.example.com --channelID mychannel --name marbles --version 1.0 --signature-policy "OR('Org1MSP.member','Org2MSP.member')" --init-required --sequence 1 --tls true --cafile $ORDERER_CA
9. We can now use the peer lifecycle chaincode commit command to commit the chaincode definition to the channel:
export ORDERER_CA=${PWD}/organizations/ordererOrganizations/example.com/orderers/orderer.example.com/msp/tlscacerts/tlsca.example.com-cert.pem
export ORG1_CA=${PWD}/organizations/peerOrganizations/org1.example.com/peers/peer0.org1.example.com/tls/ca.crt
export ORG2_CA=${PWD}/organizations/peerOrganizations/org2.example.com/peers/peer0.org2.example.com/tls/ca.crt
peer lifecycle chaincode commit -o localhost:7050 --ordererTLSHostnameOverride orderer.example.com --channelID mychannel --name marbles --version 1.0 --sequence 1 --signature-policy "OR('Org1MSP.member','Org2MSP.member')" --init-required --tls true --cafile $ORDERER_CA --peerAddresses localhost:7051 --tlsRootCertFiles $ORG1_CA --peerAddresses localhost:9051 --tlsRootCertFiles $ORG2_CA
When the commit transaction completes successfully you should see something similar to:
2019-04-22 18:57:34.274 UTC [chaincodeCmd] ClientWait -> INFO 001 txid [3da8b0bb8e128b5e1b6e4884359b5583dff823fce2624f975c69df6bce614614] committed with status (VALID) at peer0.org2.example.com:9051
2019-04-22 18:57:34.709 UTC [chaincodeCmd] ClientWait -> INFO 002 txid [3da8b0bb8e128b5e1b6e4884359b5583dff823fce2624f975c69df6bce614614] committed with status (VALID) at peer0.org1.example.com:7051
10. Because the marbles chaincode contains an initialization function, we need to
use the peer chaincode invoke command
to invoke Init() before we can use other functions in the chaincode:
peer chaincode invoke -o localhost:7050 --ordererTLSHostnameOverride orderer.example.com --channelID mychannel --name marbles --isInit --tls true --cafile $ORDERER_CA --peerAddresses localhost:7051 --tlsRootCertFiles $ORG1_CA -c '{"Args":["Init"]}'
Verify index was deployed
Indexes will be deployed to each peer’s CouchDB state database once the chaincode has been installed on the peer and deployed to the channel. You can verify that the CouchDB index was created successfully by examining the peer log in the Docker container.
Try it yourself
To view the logs in the peer Docker container, open a new Terminal window and run the following command to grep for message confirmation that the index was created.
docker logs peer0.org1.example.com 2>&1 | grep "CouchDB index"
You should see a result that looks like the following:
[couchdb] CreateIndex -> INFO 0be Created CouchDB index [indexOwner] in state database [mychannel_marbles] using design document [_design/indexOwnerDoc]
Nota
If you installed Marbles on a different peer than peer0.org1.example.com,
you may need to replace it with the name of a different peer where
Marbles was installed.
Query the CouchDB State Database
Now that the index has been defined in the JSON file and deployed alongside the chaincode, chaincode functions can execute JSON queries against the CouchDB state database, and thereby peer commands can invoke the chaincode functions.
Specifying an index name on a query is optional. If not specified, and an index already exists for the fields being queried, the existing index will be automatically used.
Dica
It is a good practice to explicitly include an index name on a
query using the use_index keyword. Without it, CouchDB may pick a
less optimal index. Also CouchDB may not use an index at all and you
may not realize it, at the low volumes during testing. Only upon
higher volumes you may realize slow performance because CouchDB is not
using an index and you assumed it was.
Build the query in chaincode
You can perform complex rich queries against the data on the ledger using queries defined within your chaincode. The marbles02 sample includes two rich query functions:
queryMarbles –
Example of an ad hoc rich query. This is a query where a (selector) string can be passed into the function. This query would be useful to client applications that need to dynamically build their own selectors at runtime. For more information on selectors refer to CouchDB selector syntax.
queryMarblesByOwner –
Example of a parameterized query where the query logic is baked into the chaincode. In this case the function accepts a single argument, the marble owner. It then queries the state database for JSON documents matching the docType of “marble” and the owner id using the JSON query syntax.
Run the query using the peer command
In absence of a client application, we can use the peer command to test the
queries defined in the chaincode. We will customize the peer chaincode query
command to use the Marbles index indexOwner and query for all marbles owned
by «tom» using the queryMarbles function.
Try it yourself
Before querying the database, we should add some data. Run the following command as Org1 to create a marble owned by «tom»:
export CORE_PEER_LOCALMSPID="Org1MSP"
export CORE_PEER_TLS_ROOTCERT_FILE=${PWD}/organizations/peerOrganizations/org1.example.com/peers/peer0.org1.example.com/tls/ca.crt
export CORE_PEER_MSPCONFIGPATH=${PWD}/organizations/peerOrganizations/org1.example.com/users/Admin@org1.example.com/msp
export CORE_PEER_ADDRESS=localhost:7051
peer chaincode invoke -o localhost:7050 --ordererTLSHostnameOverride orderer.example.com --tls --cafile ${PWD}/organizations/ordererOrganizations/example.com/orderers/orderer.example.com/msp/tlscacerts/tlsca.example.com-cert.pem -C mychannel -n marbles -c '{"Args":["initMarble","marble1","blue","35","tom"]}'
After an index has been deployed when the chaincode is initialized, it will
automatically be utilized by chaincode queries. CouchDB can determine which
index to use based on the fields being queried. If an index exists for the
query criteria it will be used. However the recommended approach is to
specify the use_index keyword on the query. The peer command below is an
example of how to specify the index explicitly in the selector syntax by
including the use_index keyword:
// Rich Query with index name explicitly specified:
peer chaincode query -C mychannel -n marbles -c '{"Args":["queryMarbles", "{\"selector\":{\"docType\":\"marble\",\"owner\":\"tom\"}, \"use_index\":[\"_design/indexOwnerDoc\", \"indexOwner\"]}"]}'
Delving into the query command above, there are three arguments of interest:
queryMarbles
Name of the function in the Marbles chaincode. Notice a shimshim.ChaincodeStubInterfaceis used to access and modify the ledger. ThegetQueryResultForQueryString()passes the queryString to the shim APIgetQueryResult().
func (t *SimpleChaincode) queryMarbles(stub shim.ChaincodeStubInterface, args []string) pb.Response {

        //   0
        // "queryString"
         if len(args) < 1 {
                 return shim.Error("Incorrect number of arguments. Expecting 1")
         }

         queryString := args[0]

         queryResults, err := getQueryResultForQueryString(stub, queryString)
         if err != nil {
               return shim.Error(err.Error())
         }
         return shim.Success(queryResults)
}
{"selector":{"docType":"marble","owner":"tom"}
This is an example of an ad hoc selector string which finds all documents of typemarblewhere theownerattribute has a value oftom.
"use_index":["_design/indexOwnerDoc", "indexOwner"]
Specifies both the design doc nameindexOwnerDocand index nameindexOwner. In this example the selector query explicitly includes the index name, specified by using theuse_indexkeyword. Recalling the index definition above Create an index, it contains a design doc,"ddoc":"indexOwnerDoc". With CouchDB, if you plan to explicitly include the index name on the query, then the index definition must include theddocvalue, so it can be referenced with theuse_indexkeyword.
The query runs successfully and the index is leveraged with the following results:
Query Result: [{"Key":"marble1", "Record":{"color":"blue","docType":"marble","name":"marble1","owner":"tom","size":35}}]
Use best practices for queries and indexes
Queries that use indexes will complete faster, without having to scan the full database in couchDB. Understanding indexes will allow you to write your queries for better performance and help your application handle larger amounts of data or blocks on your network.
It is also important to plan the indexes you install with your chaincode. You should install only a few indexes per chaincode that support most of your queries. Adding too many indexes, or using an excessive number of fields in an index, will degrade the performance of your network. This is because the indexes are updated after each block is committed. The more indexes need to be updated through «index warming», the longer it will take for transactions to complete.
The examples in this section will help demonstrate how queries use indexes and what type of queries will have the best performance. Remember the following when writing your queries:
- All fields in the index must also be in the selector or sort sections of your query for the index to be used.
- More complex queries will have a lower performance and will be less likely to use an index.
- You should try to avoid operators that will result in a full table scan or a
full index scan such as
$or,$inand$regex.
In the previous section of this tutorial, you issued the following query against the marbles chaincode:
// Example one: query fully supported by the index
peer chaincode query -C $CHANNEL_NAME -n marbles -c '{"Args":["queryMarbles", "{\"selector\":{\"docType\":\"marble\",\"owner\":\"tom\"}, \"use_index\":[\"indexOwnerDoc\", \"indexOwner\"]}"]}'
The marbles chaincode was installed with the indexOwnerDoc index:
{"index":{"fields":["docType","owner"]},"ddoc":"indexOwnerDoc", "name":"indexOwner","type":"json"}
Notice that both the fields in the query, docType and owner, are
included in the index, making it a fully supported query. As a result this
query will be able to use the data in the index, without having to search the
full database. Fully supported queries such as this one will return faster than
other queries from your chaincode.
If you add extra fields to the query above, it will still use the index. However, the query will additionally have to scan the indexed data for the extra fields, resulting in a longer response time. As an example, the query below will still use the index, but will take a longer time to return than the previous example.
// Example two: query fully supported by the index with additional data
peer chaincode query -C $CHANNEL_NAME -n marbles -c '{"Args":["queryMarbles", "{\"selector\":{\"docType\":\"marble\",\"owner\":\"tom\",\"color\":\"red\"}, \"use_index\":[\"/indexOwnerDoc\", \"indexOwner\"]}"]}'
A query that does not include all fields in the index will have to scan the full
database instead. For example, the query below searches for the owner, without
specifying the the type of item owned. Since the ownerIndexDoc contains both
the owner and docType fields, this query will not be able to use the
index.
// Example three: query not supported by the index
peer chaincode query -C $CHANNEL_NAME -n marbles -c '{"Args":["queryMarbles", "{\"selector\":{\"owner\":\"tom\"}, \"use_index\":[\"indexOwnerDoc\", \"indexOwner\"]}"]}'
In general, more complex queries will have a longer response time, and have a
lower chance of being supported by an index. Operators such as $or, $in,
and $regex will often cause the query to scan the full index or not use the
index at all.
As an example, the query below contains an $or term that will search for every
marble and every item owned by tom.
// Example four: query with $or supported by the index
peer chaincode query -C $CHANNEL_NAME -n marbles -c '{"Args":["queryMarbles", "{\"selector\":{"\$or\":[{\"docType\:\"marble\"},{\"owner\":\"tom\"}]}, \"use_index\":[\"indexOwnerDoc\", \"indexOwner\"]}"]}'
This query will still use the index because it searches for fields that are
included in indexOwnerDoc. However, the $or condition in the query
requires a scan of all the items in the index, resulting in a longer response
time.
Below is an example of a complex query that is not supported by the index.
// Example five: Query with $or not supported by the index
peer chaincode query -C $CHANNEL_NAME -n marbles -c '{"Args":["queryMarbles", "{\"selector\":{"\$or\":[{\"docType\":\"marble\",\"owner\":\"tom\"},{"\color\":"\yellow\"}]}, \"use_index\":[\"indexOwnerDoc\", \"indexOwner\"]}"]}'
The query searches for all marbles owned by tom or any other items that are
yellow. This query will not use the index because it will need to search the
entire table to meet the $or condition. Depending the amount of data on your
ledger, this query will take a long time to respond or may timeout.
While it is important to follow best practices with your queries, using indexes is not a solution for collecting large amounts of data. The blockchain data structure is optimized to validate and confirm transactions and is not suited for data analytics or reporting. If you want to build a dashboard as part of your application or analyze the data from your network, the best practice is to query an off chain database that replicates the data from your peers. This will allow you to understand the data on the blockchain without degrading the performance of your network or disrupting transactions.
You can use block or chaincode events from your application to write transaction
data to an off-chain database or analytics engine. For each block received, the block
listener application would iterate through the block transactions and build a data
store using the key/value writes from each valid transaction’s rwset. The
Peer channel-based event services provide replayable events to ensure the integrity of
downstream data stores. For an example of how you can use an event listener to write
data to an external database, visit the Off chain data sample
in the Fabric Samples.
Query the CouchDB State Database With Pagination
When large result sets are returned by CouchDB queries, a set of APIs is
available which can be called by chaincode to paginate the list of results.
Pagination provides a mechanism to partition the result set by
specifying a pagesize and a start point – a bookmark which indicates
where to begin the result set. The client application iteratively invokes the
chaincode that executes the query until no more results are returned. For more information refer to
this topic on pagination with CouchDB.
We will use the Marbles sample
function queryMarblesWithPagination to demonstrate how
pagination can be implemented in chaincode and the client application.
queryMarblesWithPagination –
Example of an ad hoc rich query with pagination. This is a query where a (selector) string can be passed into the function similar to the above example. In this case, a
pageSizeis also included with the query as well as abookmark.
In order to demonstrate pagination, more data is required. This example assumes that you have already added marble1 from above. Run the following commands in the peer container to create four more marbles owned by «tom», to create a total of five marbles owned by «tom»:
Try it yourself
export CORE_PEER_LOCALMSPID="Org1MSP"
export CORE_PEER_TLS_ROOTCERT_FILE=${PWD}/organizations/peerOrganizations/org1.example.com/peers/peer0.org1.example.com/tls/ca.crt
export CORE_PEER_MSPCONFIGPATH=${PWD}/organizations/peerOrganizations/org1.example.com/users/Admin@org1.example.com/msp
export CORE_PEER_ADDRESS=localhost:7051
peer chaincode invoke -o localhost:7050 --ordererTLSHostnameOverride orderer.example.com --tls --cafile  ${PWD}/organizations/ordererOrganizations/example.com/orderers/orderer.example.com/msp/tlscacerts/tlsca.example.com-cert.pem -C mychannel -n marbles -c '{"Args":["initMarble","marble2","yellow","35","tom"]}'
peer chaincode invoke -o localhost:7050 --ordererTLSHostnameOverride orderer.example.com --tls --cafile  ${PWD}/organizations/ordererOrganizations/example.com/orderers/orderer.example.com/msp/tlscacerts/tlsca.example.com-cert.pem -C mychannel -n marbles -c '{"Args":["initMarble","marble3","green","20","tom"]}'
peer chaincode invoke -o localhost:7050 --ordererTLSHostnameOverride orderer.example.com --tls --cafile  ${PWD}/organizations/ordererOrganizations/example.com/orderers/orderer.example.com/msp/tlscacerts/tlsca.example.com-cert.pem -C mychannel -n marbles -c '{"Args":["initMarble","marble4","purple","20","tom"]}'
peer chaincode invoke -o localhost:7050 --ordererTLSHostnameOverride orderer.example.com --tls --cafile  ${PWD}/organizations/ordererOrganizations/example.com/orderers/orderer.example.com/msp/tlscacerts/tlsca.example.com-cert.pem -C mychannel -n marbles -c '{"Args":["initMarble","marble5","blue","40","tom"]}'
In addition to the arguments for the query in the previous example,
queryMarblesWithPagination adds pagesize and bookmark. PageSize
specifies the number of records to return per query. The bookmark is an
«anchor» telling couchDB where to begin the page. (Each page of results returns
a unique bookmark.)
queryMarblesWithPagination
Name of the function in the Marbles chaincode. Notice a shimshim.ChaincodeStubInterfaceis used to access and modify the ledger. ThegetQueryResultForQueryStringWithPagination()passes the queryString along with the pagesize and bookmark to the shim APIGetQueryResultWithPagination().
func (t *SimpleChaincode) queryMarblesWithPagination(stub shim.ChaincodeStubInterface, args []string) pb.Response {

      //   0
      // "queryString"
      if len(args) < 3 {
              return shim.Error("Incorrect number of arguments. Expecting 3")
      }

      queryString := args[0]
      //return type of ParseInt is int64
      pageSize, err := strconv.ParseInt(args[1], 10, 32)
      if err != nil {
              return shim.Error(err.Error())
      }
      bookmark := args[2]

      queryResults, err := getQueryResultForQueryStringWithPagination(stub, queryString, int32(pageSize), bookmark)
      if err != nil {
              return shim.Error(err.Error())
      }
      return shim.Success(queryResults)
}
The following example is a peer command which calls queryMarblesWithPagination
with a pageSize of 3 and no bookmark specified.
Dica
When no bookmark is specified, the query starts with the «first» page of records.
Try it yourself
// Rich Query with index name explicitly specified and a page size of 3:
peer chaincode query -C $CHANNEL_NAME -n marbles -c '{"Args":["queryMarblesWithPagination", "{\"selector\":{\"docType\":\"marble\",\"owner\":\"tom\"}, \"use_index\":[\"_design/indexOwnerDoc\", \"indexOwner\"]}","3",""]}'
The following response is received (carriage returns added for clarity), three
of the five marbles are returned because the pagsize was set to 3:
[{"Key":"marble1", "Record":{"color":"blue","docType":"marble","name":"marble1","owner":"tom","size":35}},
 {"Key":"marble2", "Record":{"color":"yellow","docType":"marble","name":"marble2","owner":"tom","size":35}},
 {"Key":"marble3", "Record":{"color":"green","docType":"marble","name":"marble3","owner":"tom","size":20}}]
[{"ResponseMetadata":{"RecordsCount":"3",
"Bookmark":"g1AAAABLeJzLYWBgYMpgSmHgKy5JLCrJTq2MT8lPzkzJBYqz5yYWJeWkGoOkOWDSOSANIFk2iCyIyVySn5uVBQAGEhRz"}}]
Nota
Bookmarks are uniquely generated by CouchDB for each query and represent a placeholder in the result set. Pass the returned bookmark on the subsequent iteration of the query to retrieve the next set of results.
The following is a peer command to call queryMarblesWithPagination with a
pageSize of 3. Notice this time, the query includes the bookmark returned
from the previous query.
Try it yourself
peer chaincode query -C $CHANNEL_NAME -n marbles -c '{"Args":["queryMarblesWithPagination", "{\"selector\":{\"docType\":\"marble\",\"owner\":\"tom\"}, \"use_index\":[\"_design/indexOwnerDoc\", \"indexOwner\"]}","3","g1AAAABLeJzLYWBgYMpgSmHgKy5JLCrJTq2MT8lPzkzJBYqz5yYWJeWkGoOkOWDSOSANIFk2iCyIyVySn5uVBQAGEhRz"]}'
The following response is received (carriage returns added for clarity). The last two records are retrieved:
[{"Key":"marble4", "Record":{"color":"purple","docType":"marble","name":"marble4","owner":"tom","size":20}},
 {"Key":"marble5", "Record":{"color":"blue","docType":"marble","name":"marble5","owner":"tom","size":40}}]
[{"ResponseMetadata":{"RecordsCount":"2",
"Bookmark":"g1AAAABLeJzLYWBgYMpgSmHgKy5JLCrJTq2MT8lPzkzJBYqz5yYWJeWkmoKkOWDSOSANIFk2iCyIyVySn5uVBQAGYhR1"}}]
The final command is a peer command to call queryMarblesWithPagination with
a pageSize of 3 and with the bookmark from the previous query.
Try it yourself
peer chaincode query -C $CHANNEL_NAME -n marbles -c '{"Args":["queryMarblesWithPagination", "{\"selector\":{\"docType\":\"marble\",\"owner\":\"tom\"}, \"use_index\":[\"_design/indexOwnerDoc\", \"indexOwner\"]}","3","g1AAAABLeJzLYWBgYMpgSmHgKy5JLCrJTq2MT8lPzkzJBYqz5yYWJeWkmoKkOWDSOSANIFk2iCyIyVySn5uVBQAGYhR1"]}'
The following response is received (carriage returns added for clarity). No records are returned, indicating that all pages have been retrieved:
[]
[{"ResponseMetadata":{"RecordsCount":"0",
"Bookmark":"g1AAAABLeJzLYWBgYMpgSmHgKy5JLCrJTq2MT8lPzkzJBYqz5yYWJeWkmoKkOWDSOSANIFk2iCyIyVySn5uVBQAGYhR1"}}]
For an example of how a client application can iterate over
the result sets using pagination, search for the getQueryResultForQueryStringWithPagination
function in the Marbles sample.
Update an Index
It may be necessary to update an index over time. The same index may exist in
subsequent versions of the chaincode that gets installed. In order for an index
to be updated, the original index definition must have included the design
document ddoc attribute and an index name. To update an index definition,
use the same index name but alter the index definition. Simply edit the index
JSON file and add or remove fields from the index. Fabric only supports the
index type JSON. Changing the index type is not supported. The updated
index definition gets redeployed to the peer’s state database when the chaincode
definition is committed to the channel. Changes to the index name or ddoc
attributes will result in a new index being created and the original index remains
unchanged in CouchDB until it is removed.
Nota
If the state database has a significant volume of data, it will take some time for the index to be re-built, during which time chaincode invokes that issue queries may fail or timeout.
Iterating on your index definition
If you have access to your peer’s CouchDB state database in a development environment, you can iteratively test various indexes in support of your chaincode queries. Any changes to chaincode though would require redeployment. Use the CouchDB Fauxton interface or a command line curl utility to create and update indexes.
Nota
The Fauxton interface is a web UI for the creation, update, and
deployment of indexes to CouchDB. If you want to try out this
interface, there is an example of the format of the Fauxton version
of the index in Marbles sample. If you have deployed the test network
with CouchDB, the Fauxton interface can be loaded by opening a browser
and navigating to http://localhost:5984/_utils.
Alternatively, if you prefer not use the Fauxton UI, the following is an example
of a curl command which can be used to create the index on the database
mychannel_marbles:
// Index for docType, owner.
// Example curl command line to define index in the CouchDB channel_chaincode database
 curl -i -X POST -H "Content-Type: application/json" -d
        "{\"index\":{\"fields\":[\"docType\",\"owner\"]},
          \"name\":\"indexOwner\",
          \"ddoc\":\"indexOwnerDoc\",
          \"type\":\"json\"}" http://hostname:port/mychannel_marbles/_index
Nota
If you are using the test network configured with CouchDB, replace
hostname:port with localhost:5984.
Delete an Index
Index deletion is not managed by Fabric tooling. If you need to delete an index, manually issue a curl command against the database or delete it using the Fauxton interface.
The format of the curl command to delete an index would be:
curl -X DELETE http://localhost:5984/{database_name}/_index/{design_doc}/json/{index_name} -H "accept: */*" -H "Host: localhost:5984"
To delete the index used in this tutorial, the curl command would be:
curl -X DELETE http://localhost:5984/mychannel_marbles/_index/indexOwnerDoc/json/indexOwner -H "accept: */*" -H "Host: localhost:5984"